Adding widgets to the Radial Menu
Adding widgets is as easy as with any other layout container in UE4.
The basic workflow for a horizontal or vertical box in UE4 is simple enough. You create a widget, then you use the add child method on the container. With the radial menus, it's no different.
First, create your widget. Here we'll use the BasicRadialIcon_UMG class.
This widget only displays an icon, and can for many cases be all that's necessary for
the menu. This would normally be called from a for loop or some function gathering the necessary data
and icons for the widgets.

If additional functionality is needed, any widget class will work,
just keep sizing in mind. Wrapping a widget in a ScaleBox then wrapping that with a Size Box and overriding the Height and Width
is a great way to start.
Next we'll drag out our reference to our radial menu and call the
Add Child to Radial Menu function.
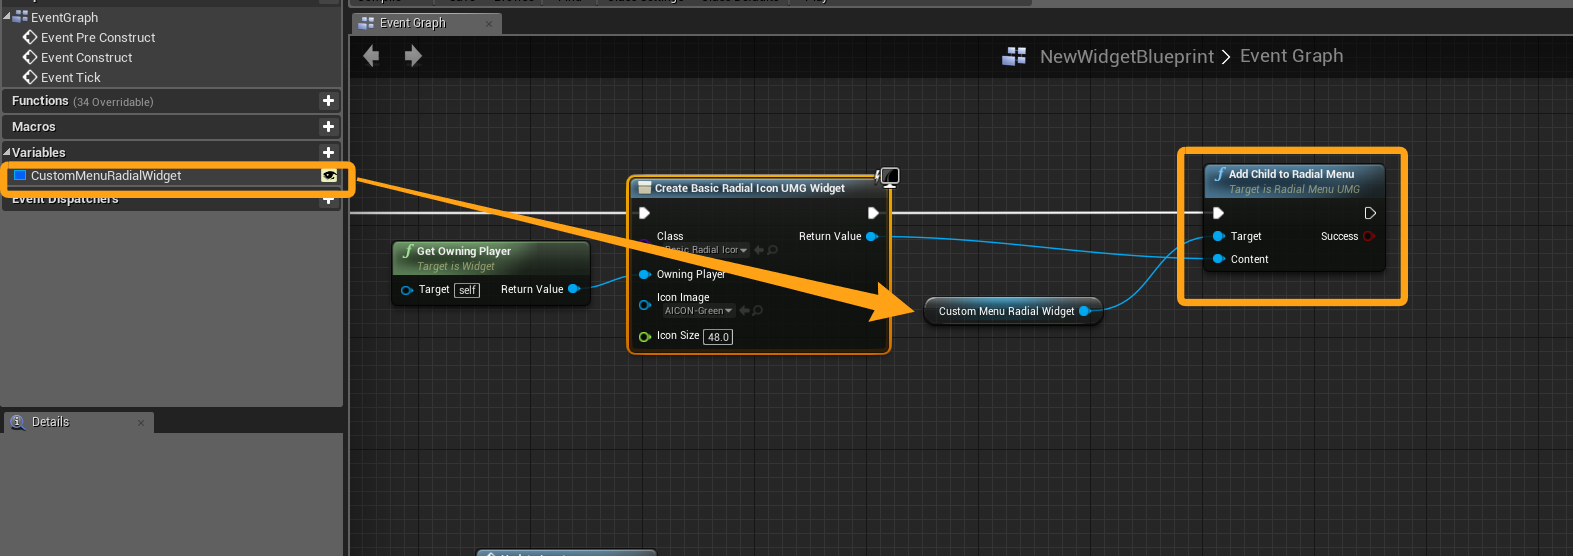
This will add the widget to the radial menu, and position it in the proper location.
Wrapping up
For a more logical use case, such as an inventory, you will want to do a for loop
of your items, and get their icons and pass it into the BasicRadialIcon_UMG or your custom widget.
This is where having Allow Resizing == true comes in handy. That way you can add as many or as
few widgets as necessary and have the menu adapt. Otherwise, you will get a false from Add Child to Radial Menu.