Setting Up Input
Unreal Engine 4 uses the PlayerController class as a mediator of input between players and the game.
While pawns and other actors can recieve input, the player controller is the best place for things like menu input and other universal inputs such as pause and play, since they do not
rely on a player pawn and may need to be used in a situation where a pawn doesn't exist. One such scenario would be when the player isn't spawned yet, but some settings must be selected, or the player wants to back out of a match.
So naturally, this is the most convenient place to put the radial menu input.
There are two methods of getting input. Implementing an interface or inheriting from a base class. Both will do the same thing, but inheriting requires only one step.
If you are already fluent in the workings of UE4 and the blueprint system, the steps are these:
Method 1:
- Inherit from the BP_RadialInputPlayerController
Method 2:
-
Implement the IRadialInput interface in your player controller. Next, implement the "GetJoystickDirection" method.
-
Fill out the method with the contents from the BP_RadialInputPlayerController "GetJoystickDirection" method.
Important: If you already have a player controller that inherits from another controller, maybe one from another plugin or asset, the interface method may be easier, and more logical.
Method 1: Inheritance
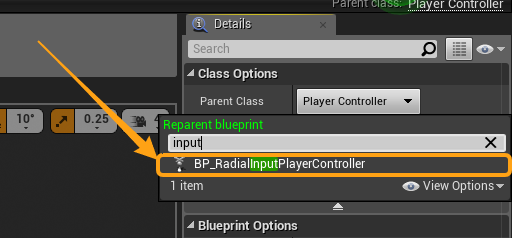
Open your PlayerController blueprint (or to make a new one, see step one of the next method.) and go to class settings.

then click parent class option button,
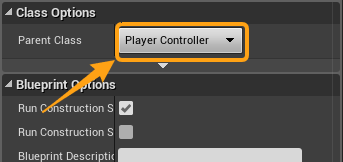
and choose BP_RadialInputPlayerController. You may have to search to find it, depending on the contents of your project.
Now make sure your PlayerController is being used in your gamemode, and joystick input should now be active for your radial menus!
How to assign a player controller for use.
Method 2: Implementing the IRadialInput Interface
This method will work with any PlayerController and makes it possible to add input completely non-destructively to your current class heirarchy.
Interfaces are merely a coding tool to allow you to declare what methods a class will have, allowing other classes to communicate with those functions
without needing to cast to your specific class. It's a great way to handle many different things that may have completely different classes but similar
functions, such as interactable objects.
If you've never used interfaces before, check out the UE4 documentation here: Unreal Interface Documentation
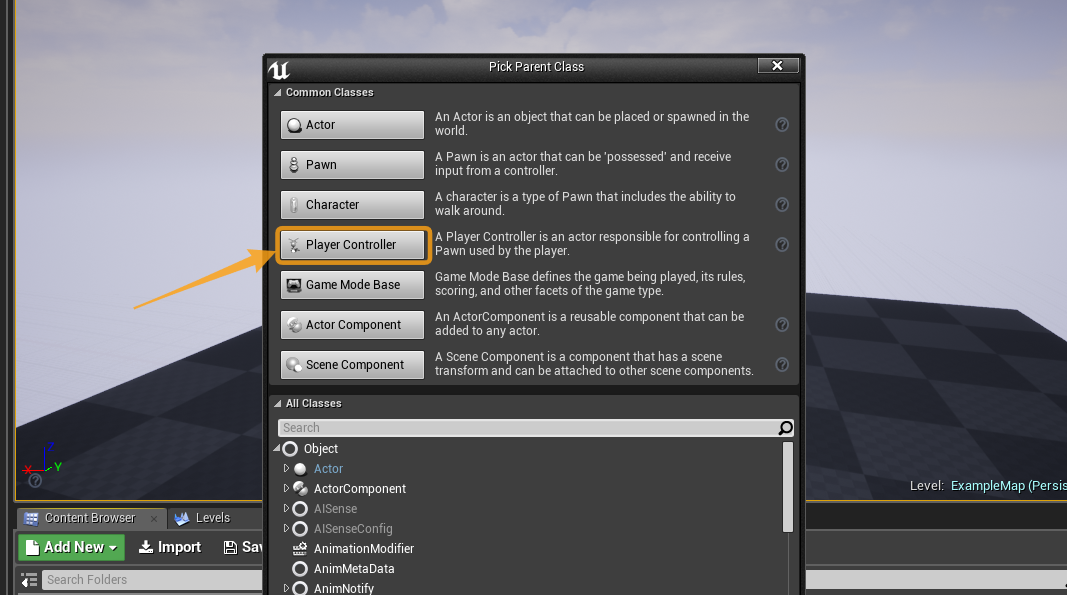
Step 1: Create a PlayerController blueprint
First locate the Add New button in the content browser, then select to create a new blueprint class.
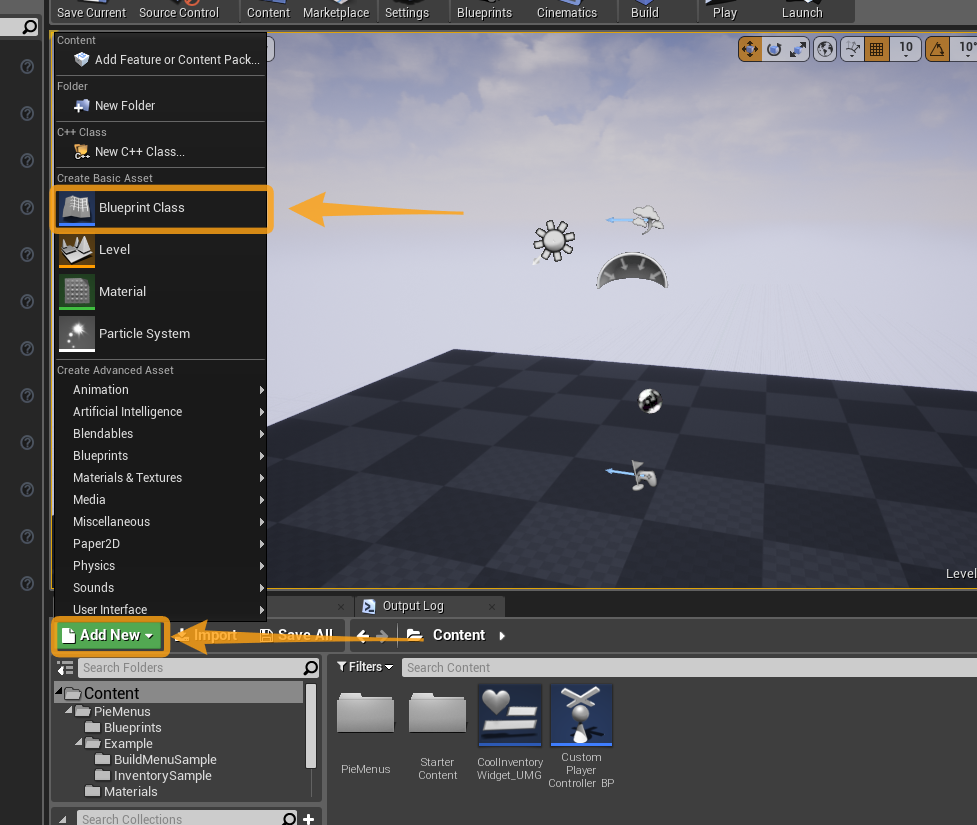
Then select PlayerController. This will create your new player controller class.
Step 2: Adding the interface
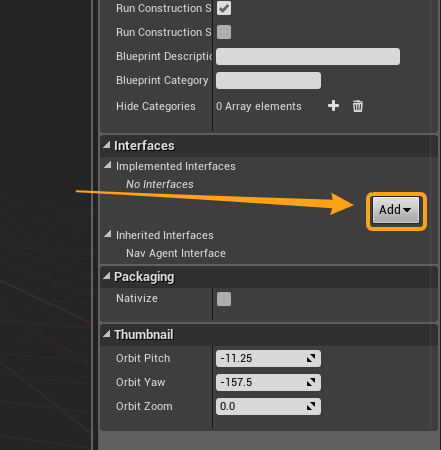
Once inside your new PlayerController blueprint, select Class Settings.
Then go to the interface section, and press the Add button,
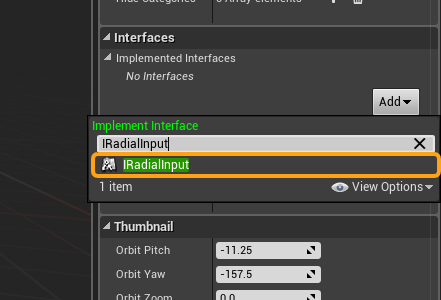
Then search and select the IRadialInput interface. This will make your PlayerController compatible with the radial menu system.
Step 3: Implementing input functionality
Now that you're PlayerController is implementing the IRadialInput interface, it's time to fill in the functionality!
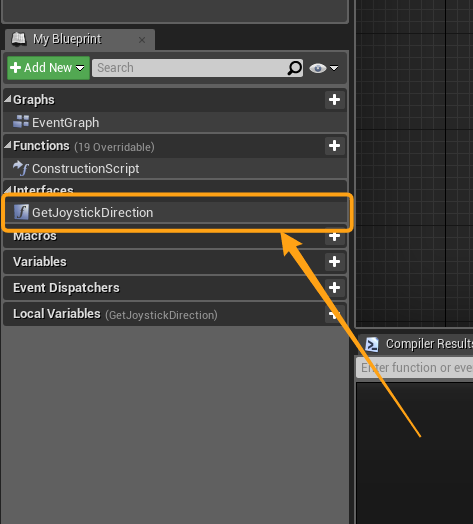
Find the tab marked My Blueprint and locate the interface section. Then double click the GetJoystickDirection method.
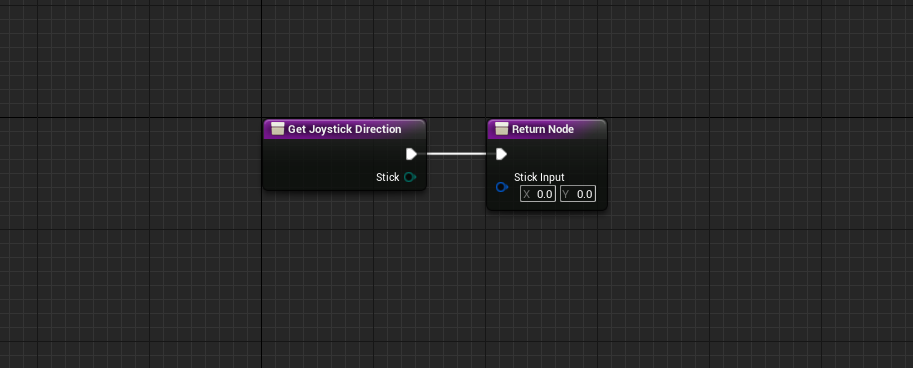
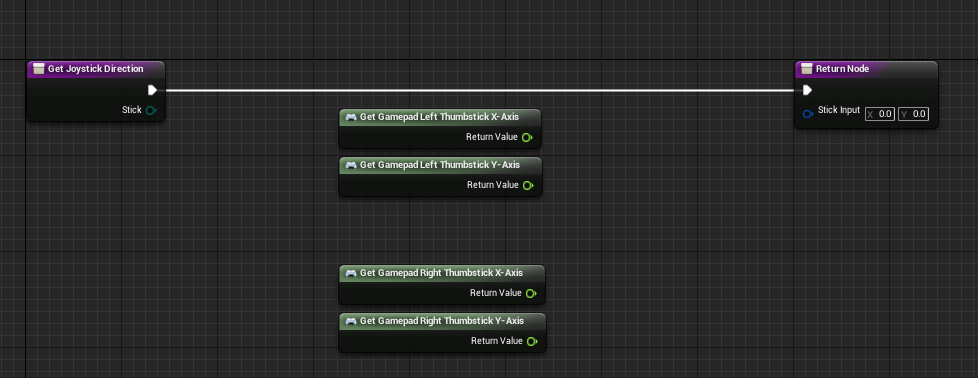
Upon opening, you should be greeted with this:
Note:
If you don't want to make the nodes yourself, just check out the GetJoystickDirection method on the BP_RadialInputPlayerController class.
You can just copy the nodes and paste them into your new function, just make sure you get all of the connections setup as they were from
the original version.
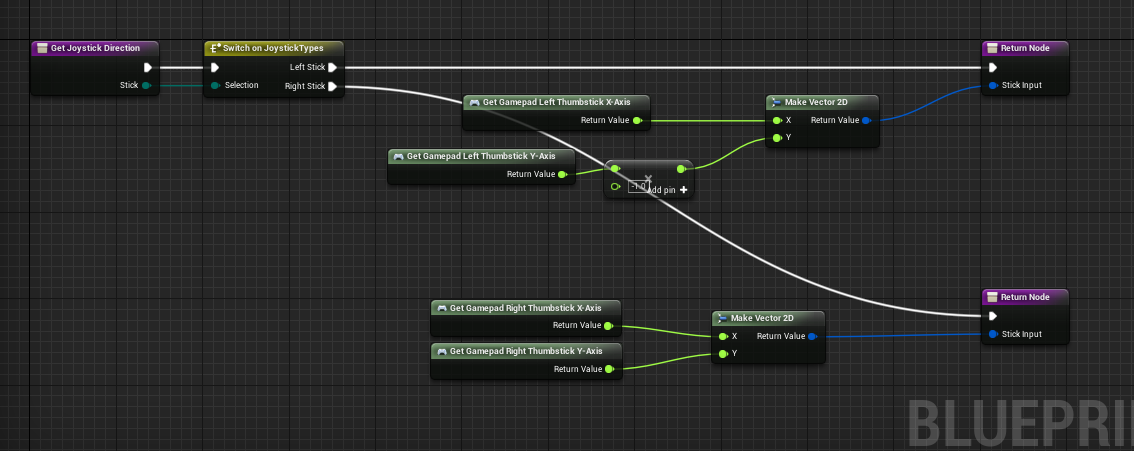
Right click the graph area and search for thumbstick axis. This should show the following nodes:
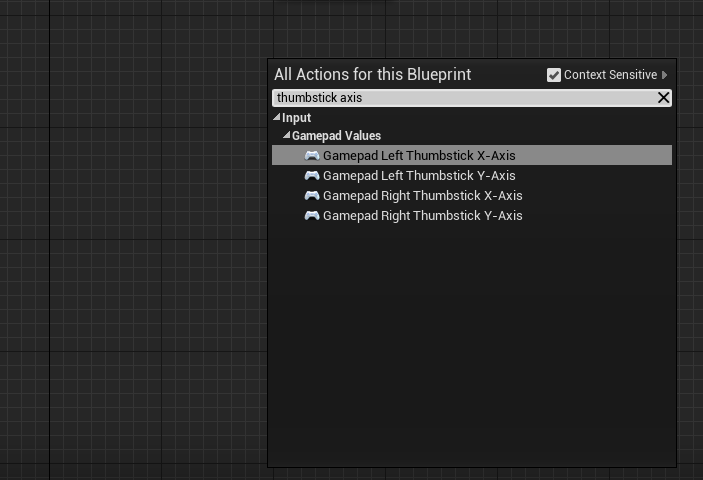
Add all four nodes and arrange them as seen here:
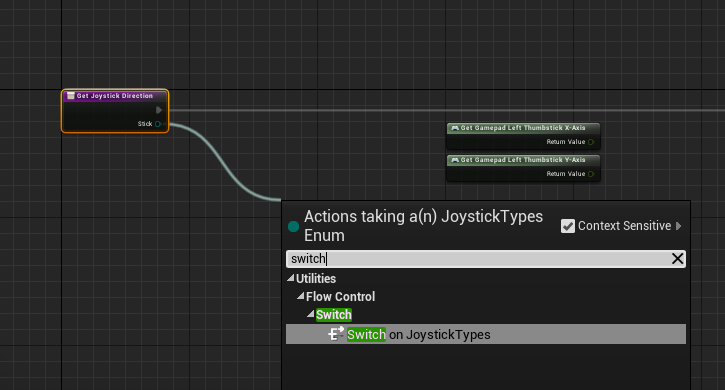
Now add a switch off of the Joystick input of the function,
Now select all four nodes, and set the settings on each nodes to match this:
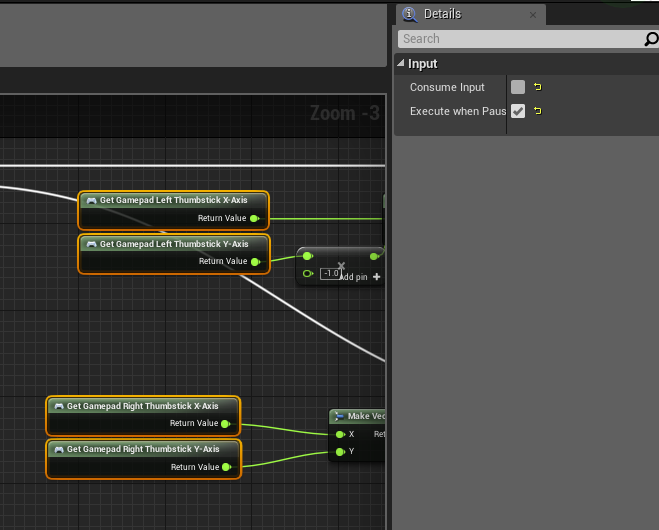
By disabling Consume Input we prevent the controller from removing input from the camera and motion controls, and Execute when Paused will allow the radial menus
to be used in pause menus.
Now add two Make Vector2D nodes, then connect x and y for each stick to their own Vector2D x and y inputs. Arrange them like so, making sure to multiply the Y axis of the left stick by -1.
It should look like this once completed:
Now your player controller should be ready for use. If you haven't assign the player controller to your game mode yet, now is the time to do so.